Free ComfyUI Workflows
Check out these free ComfyUI workflows for a variety of common professional graphic tasks. These workflows are great for product photography and general digital design. Start your journey in mascot or character design, or expand on these workflows to suit your needs. You can test out these workflows online for free at Beavey.com. Check back regularly as I'm always adding new workflows to this page. Contact me if you need help getting started with these workflows.
Replace Product Backgrounds - With Image Relighting
Replace Product Backgrounds - With Image Relighting
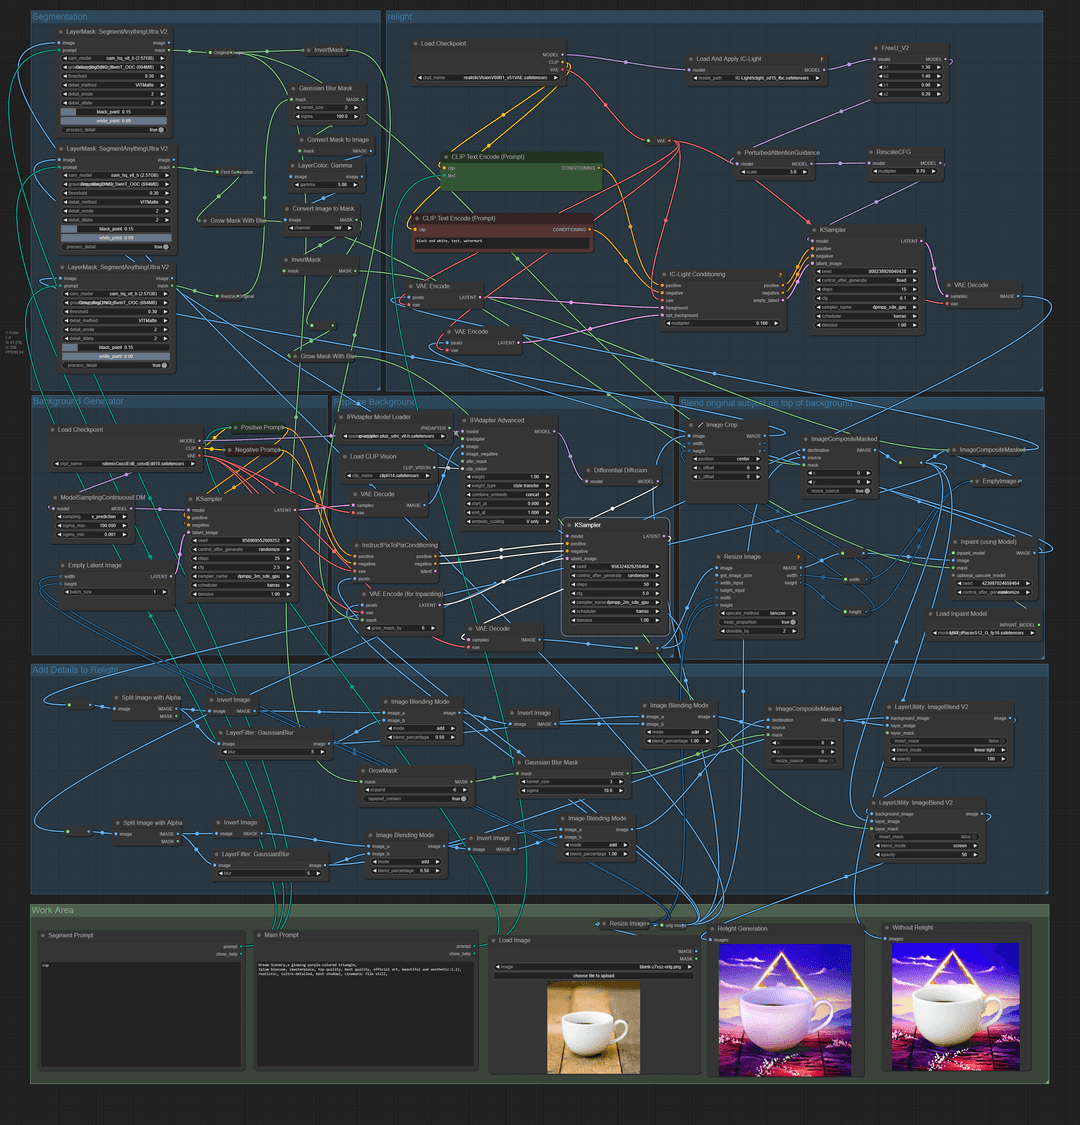
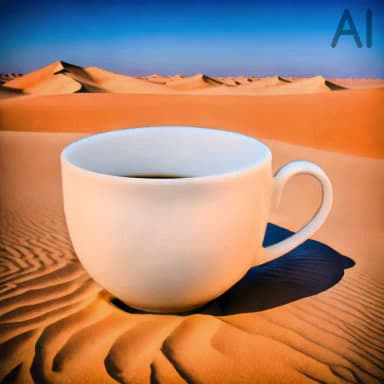
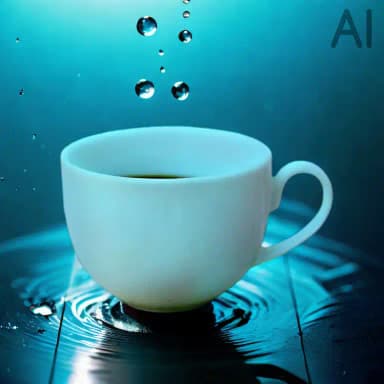
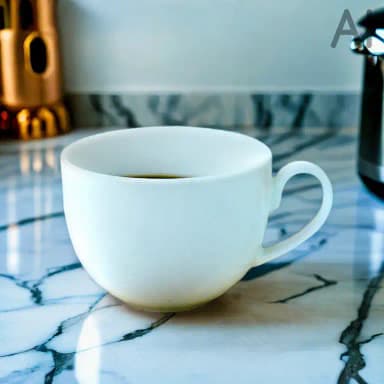
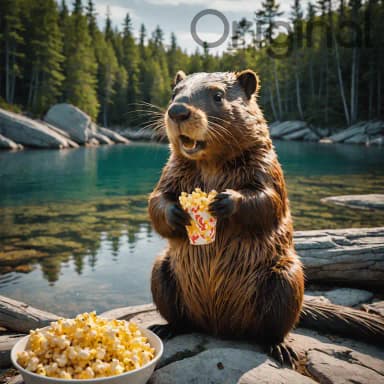
This workflow takes any image of a product (or person) and replaces the image's background, while retaining the product and its details. The image goes through a relight pass to more naturally blend the isolated product layer with the background's lighting and color. Through segmentation, you can specify which item in the original image is retained. Frequency Separation is utilized to retain text and other important details that would otherwise be lost during generation. This workflow uses a combination of SDXL and 1.5 models and requires good hardware to run locally. This workflow outputs a version with the original product lighting and a version with the relit scene, providing quite professional results.
This workflow takes any image of a product (or person) and replaces the image's background, while retaining the product and its details. The image goes through a relight pass to more naturally blend the isolated product layer with the background's lighting and color. Through segmentation, you can specify which item in the original image is retained. Frequency Separation is utilized to retain text and other important details that would otherwise be lost during generation. This workflow uses a combination of SDXL and 1.5 models and requires good hardware to run locally. This workflow outputs a version with the original product lighting and a version with the relit scene, providing quite professional results.

Replace Product Backgrounds - With Image Relighting (1)
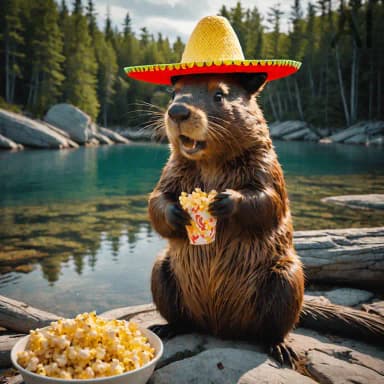
This workflow takes any image of a product (or person) and replaces the image's background, while retaining the product and its details. The image goes through a relight pass to more naturally blend the isolated product layer with the background's lighting and color. Through segmentation, you can specify which item in the original image is retained. Frequency Separation is utilized to retain text and other important details that would otherwise be lost during generation. This workflow uses a combination of SDXL and 1.5 models and requires good hardware to run locally. This workflow outputs a version with the original product lighting and a version with the relit scene, providing quite professional results.
Replace Product Backgrounds - With Image Relighting (2)
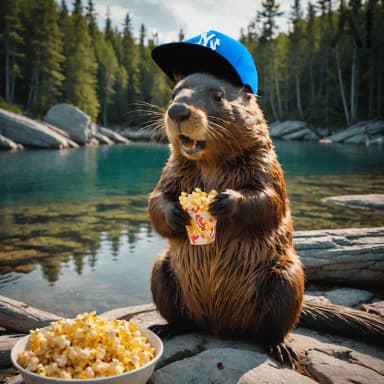
This workflow takes any image of a product (or person) and replaces the image's background, while retaining the product and its details. The image goes through a relight pass to more naturally blend the isolated product layer with the background's lighting and color. Through segmentation, you can specify which item in the original image is retained. Frequency Separation is utilized to retain text and other important details that would otherwise be lost during generation. This workflow uses a combination of SDXL and 1.5 models and requires good hardware to run locally. This workflow outputs a version with the original product lighting and a version with the relit scene, providing quite professional results.
Replace Product Backgrounds - With Image Relighting (3)
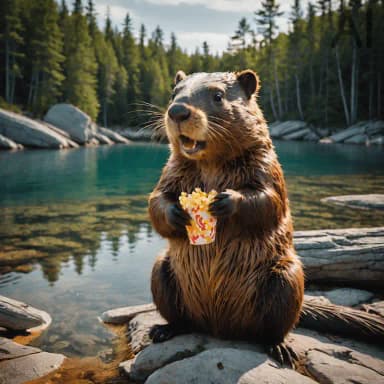
This workflow takes any image of a product (or person) and replaces the image's background, while retaining the product and its details. The image goes through a relight pass to more naturally blend the isolated product layer with the background's lighting and color. Through segmentation, you can specify which item in the original image is retained. Frequency Separation is utilized to retain text and other important details that would otherwise be lost during generation. This workflow uses a combination of SDXL and 1.5 models and requires good hardware to run locally. This workflow outputs a version with the original product lighting and a version with the relit scene, providing quite professional results.
Replace Product Backgrounds - With Image Relighting (4)
This workflow takes any image of a product (or person) and replaces the image's background, while retaining the product and its details. The image goes through a relight pass to more naturally blend the isolated product layer with the background's lighting and color. Through segmentation, you can specify which item in the original image is retained. Frequency Separation is utilized to retain text and other important details that would otherwise be lost during generation. This workflow uses a combination of SDXL and 1.5 models and requires good hardware to run locally. This workflow outputs a version with the original product lighting and a version with the relit scene, providing quite professional results.
Relight Images with Optional Text Detail Preservation
Relight Images with Optional Text Detail Preservation
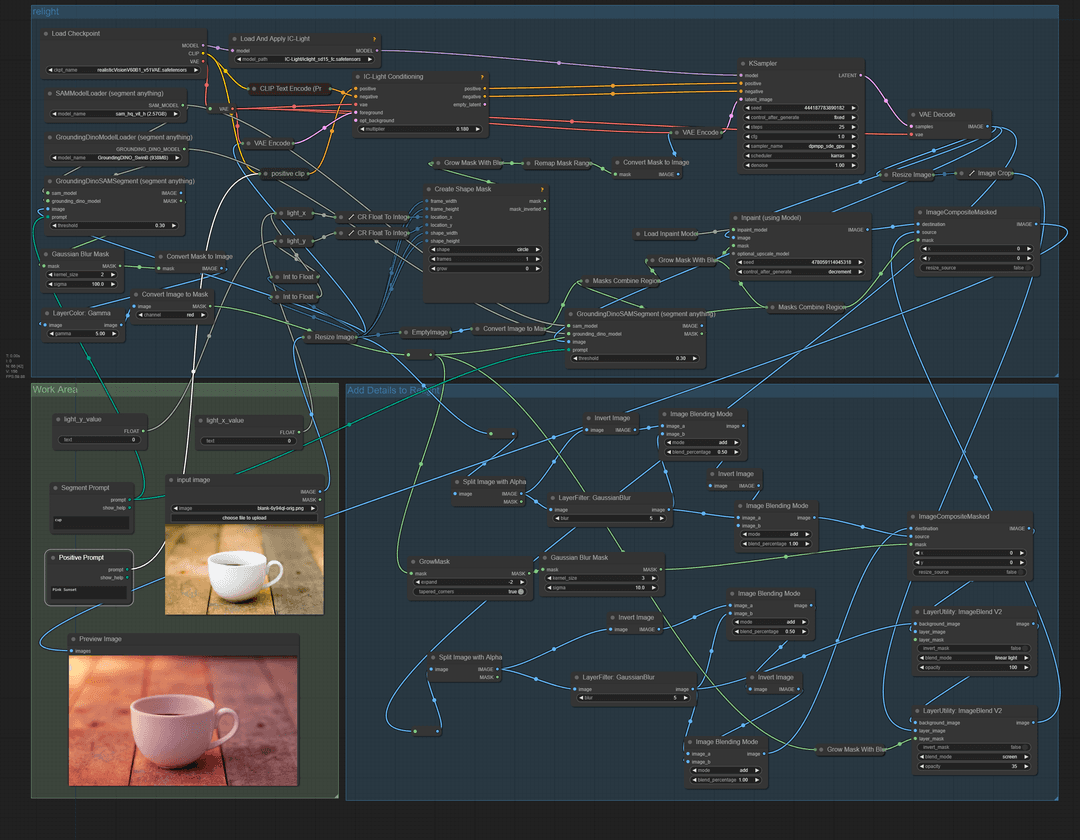
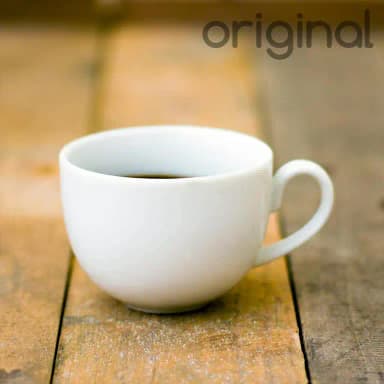
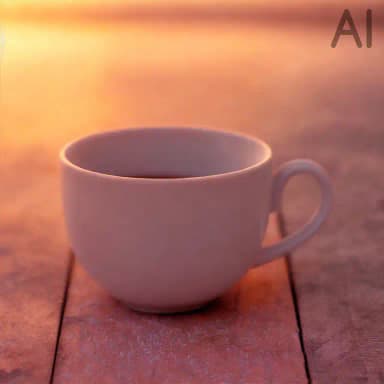
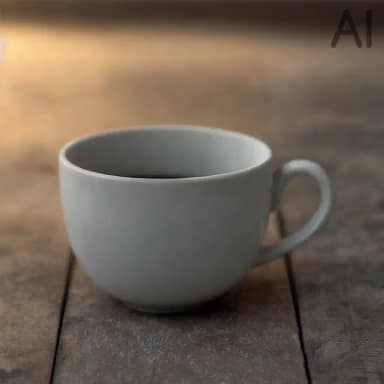
A simple relighting workflow using the IC-light conditioning model. Instead of sending a separate background image and isolated product image to the model, this workflow sends the entire image layer to the conditioning model. This allows for more freedom to control the end result via prompting alone. You can control the light direction via the light_x and light_y values, which accept a float value of 0-1, allowing you to move the light source to all corners of the scene. With a fixed seed, you can create animations by moving the light direction in small increments and saving each frame. Additional AI video frame interpolation can assist in smoothing the end video results (not included in this workflow). Since this workflow utilizes SD 1.5 models only, it is significantly less resource-intensive for local hardware.
A simple relighting workflow using the IC-light conditioning model. Instead of sending a separate background image and isolated product image to the model, this workflow sends the entire image layer to the conditioning model. This allows for more freedom to control the end result via prompting alone. You can control the light direction via the light_x and light_y values, which accept a float value of 0-1, allowing you to move the light source to all corners of the scene. With a fixed seed, you can create animations by moving the light direction in small increments and saving each frame. Additional AI video frame interpolation can assist in smoothing the end video results (not included in this workflow). Since this workflow utilizes SD 1.5 models only, it is significantly less resource-intensive for local hardware.
Relight Images with Optional Text Detail Preservation (1)
A simple relighting workflow using the IC-light conditioning model. Instead of sending a separate background image and isolated product image to the model, this workflow sends the entire image layer to the conditioning model. This allows for more freedom to control the end result via prompting alone. You can control the light direction via the light_x and light_y values, which accept a float value of 0-1, allowing you to move the light source to all corners of the scene. With a fixed seed, you can create animations by moving the light direction in small increments and saving each frame. Additional AI video frame interpolation can assist in smoothing the end video results (not included in this workflow). Since this workflow utilizes SD 1.5 models only, it is significantly less resource-intensive for local hardware.
Relight Images with Optional Text Detail Preservation (2)
A simple relighting workflow using the IC-light conditioning model. Instead of sending a separate background image and isolated product image to the model, this workflow sends the entire image layer to the conditioning model. This allows for more freedom to control the end result via prompting alone. You can control the light direction via the light_x and light_y values, which accept a float value of 0-1, allowing you to move the light source to all corners of the scene. With a fixed seed, you can create animations by moving the light direction in small increments and saving each frame. Additional AI video frame interpolation can assist in smoothing the end video results (not included in this workflow). Since this workflow utilizes SD 1.5 models only, it is significantly less resource-intensive for local hardware.
Relight Images with Optional Text Detail Preservation (3)
A simple relighting workflow using the IC-light conditioning model. Instead of sending a separate background image and isolated product image to the model, this workflow sends the entire image layer to the conditioning model. This allows for more freedom to control the end result via prompting alone. You can control the light direction via the light_x and light_y values, which accept a float value of 0-1, allowing you to move the light source to all corners of the scene. With a fixed seed, you can create animations by moving the light direction in small increments and saving each frame. Additional AI video frame interpolation can assist in smoothing the end video results (not included in this workflow). Since this workflow utilizes SD 1.5 models only, it is significantly less resource-intensive for local hardware.
Relight Images with Optional Text Detail Preservation (4)
A simple relighting workflow using the IC-light conditioning model. Instead of sending a separate background image and isolated product image to the model, this workflow sends the entire image layer to the conditioning model. This allows for more freedom to control the end result via prompting alone. You can control the light direction via the light_x and light_y values, which accept a float value of 0-1, allowing you to move the light source to all corners of the scene. With a fixed seed, you can create animations by moving the light direction in small increments and saving each frame. Additional AI video frame interpolation can assist in smoothing the end video results (not included in this workflow). Since this workflow utilizes SD 1.5 models only, it is significantly less resource-intensive for local hardware.
Consistent Character Starter Sheet (Mascot Tool Pt.1)
Consistent Character Starter Sheet (Mascot Tool Pt.1)
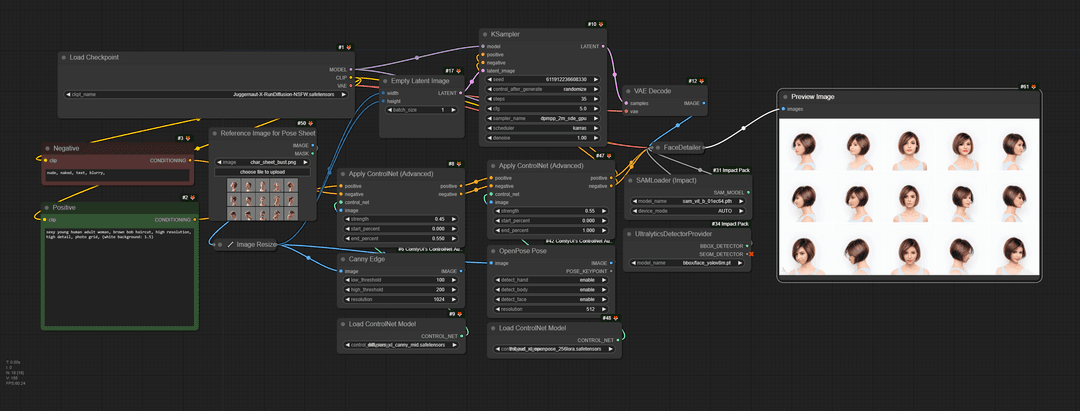
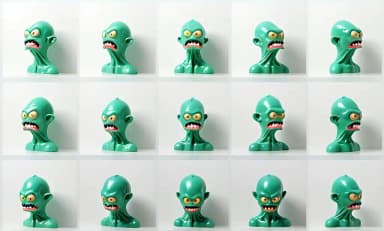
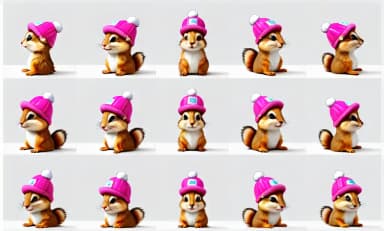
Did you know you can create consistent characters in Stable Diffusion without any art skills or existing artwork? Using this workflow, you can generate a character sheet that can then be used as a starting point for training your own custom Lora model. Just take the character sheet, slice each frame into separate image files, and start training your model. You can further train your new Lora with images generated from the Lora to better refine your character or mascot. Select a base checkpoint that suits your desired end results; for instance, a toon-based checkpoint for a toon character.
Did you know you can create consistent characters in Stable Diffusion without any art skills or existing artwork? Using this workflow, you can generate a character sheet that can then be used as a starting point for training your own custom Lora model. Just take the character sheet, slice each frame into separate image files, and start training your model. You can further train your new Lora with images generated from the Lora to better refine your character or mascot. Select a base checkpoint that suits your desired end results; for instance, a toon-based checkpoint for a toon character.
Consistent Character Starter Sheet (Mascot Tool Pt.1) (1)
Did you know you can create consistent characters in Stable Diffusion without any art skills or existing artwork? Using this workflow, you can generate a character sheet that can then be used as a starting point for training your own custom Lora model. Just take the character sheet, slice each frame into separate image files, and start training your model. You can further train your new Lora with images generated from the Lora to better refine your character or mascot. Select a base checkpoint that suits your desired end results; for instance, a toon-based checkpoint for a toon character.
Consistent Character Starter Sheet (Mascot Tool Pt.1) (2)
Did you know you can create consistent characters in Stable Diffusion without any art skills or existing artwork? Using this workflow, you can generate a character sheet that can then be used as a starting point for training your own custom Lora model. Just take the character sheet, slice each frame into separate image files, and start training your model. You can further train your new Lora with images generated from the Lora to better refine your character or mascot. Select a base checkpoint that suits your desired end results; for instance, a toon-based checkpoint for a toon character.
Consistent Character Starter Sheet (Mascot Tool Pt.1) (3)
Did you know you can create consistent characters in Stable Diffusion without any art skills or existing artwork? Using this workflow, you can generate a character sheet that can then be used as a starting point for training your own custom Lora model. Just take the character sheet, slice each frame into separate image files, and start training your model. You can further train your new Lora with images generated from the Lora to better refine your character or mascot. Select a base checkpoint that suits your desired end results; for instance, a toon-based checkpoint for a toon character.
Consistent Character Starter Sheet (Mascot Tool Pt.1) (4)
Did you know you can create consistent characters in Stable Diffusion without any art skills or existing artwork? Using this workflow, you can generate a character sheet that can then be used as a starting point for training your own custom Lora model. Just take the character sheet, slice each frame into separate image files, and start training your model. You can further train your new Lora with images generated from the Lora to better refine your character or mascot. Select a base checkpoint that suits your desired end results; for instance, a toon-based checkpoint for a toon character.
Working with Lora's (Mascot Tool Pt.2)
Working with Lora's (Mascot Tool Pt.2)
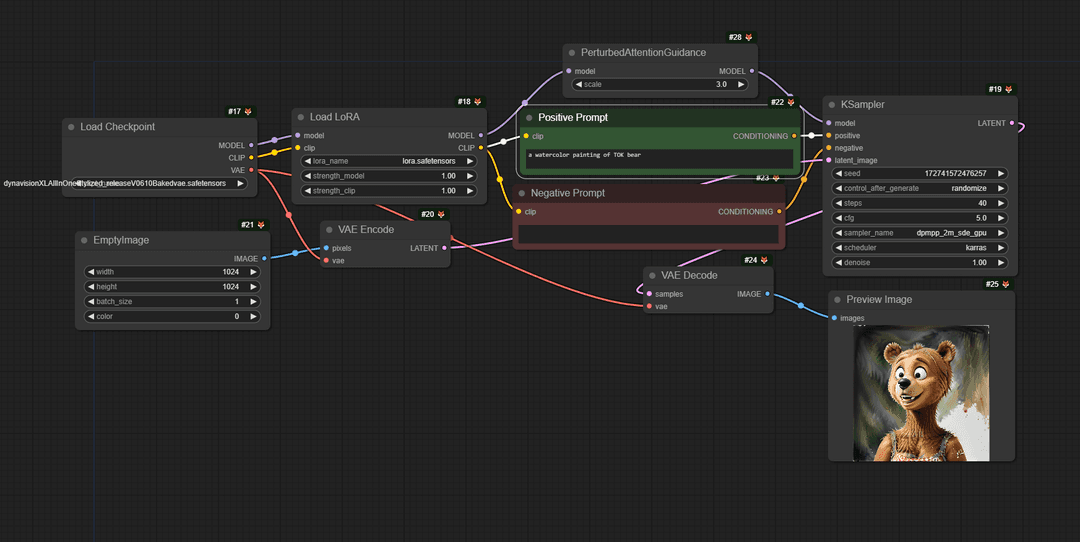
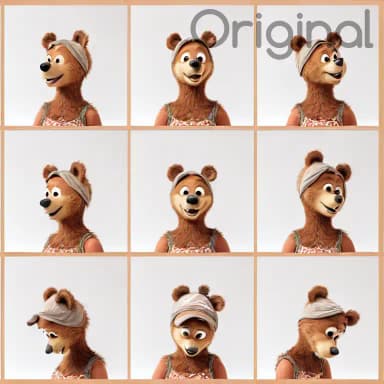
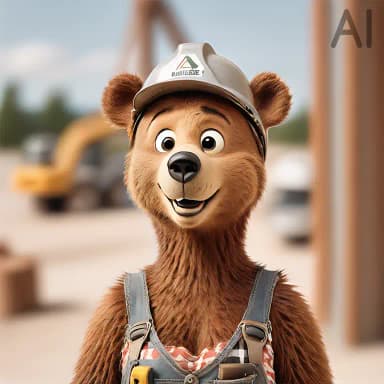
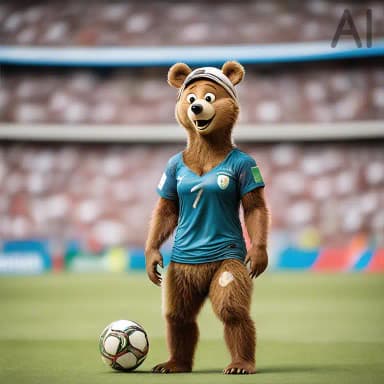
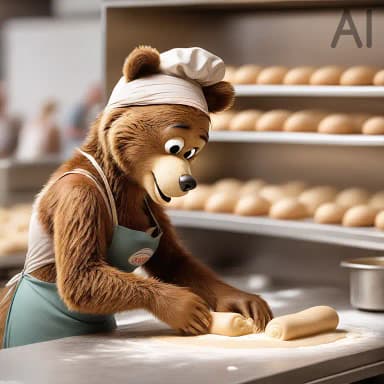
This workflow lets you load a Lora model that can be enhanced with whatever checkpoint you choose. In my examples, I used the Dynavision SDXL checkpoint as my Lora (of the bear) is in a toon style, which this checkpoint excels at. Changing the base checkpoint before training your Lora can really expand the range of options you can get from any Lora model. Simply train your Lora using the slice character sheet from the previous workflow and load it into this workflow once you're ready to get started.
This workflow lets you load a Lora model that can be enhanced with whatever checkpoint you choose. In my examples, I used the Dynavision SDXL checkpoint as my Lora (of the bear) is in a toon style, which this checkpoint excels at. Changing the base checkpoint before training your Lora can really expand the range of options you can get from any Lora model. Simply train your Lora using the slice character sheet from the previous workflow and load it into this workflow once you're ready to get started.
Working with Lora's (Mascot Tool Pt.2) (1)
This workflow lets you load a Lora model that can be enhanced with whatever checkpoint you choose. In my examples, I used the Dynavision SDXL checkpoint as my Lora (of the bear) is in a toon style, which this checkpoint excels at. Changing the base checkpoint before training your Lora can really expand the range of options you can get from any Lora model. Simply train your Lora using the slice character sheet from the previous workflow and load it into this workflow once you're ready to get started.
Working with Lora's (Mascot Tool Pt.2) (2)
This workflow lets you load a Lora model that can be enhanced with whatever checkpoint you choose. In my examples, I used the Dynavision SDXL checkpoint as my Lora (of the bear) is in a toon style, which this checkpoint excels at. Changing the base checkpoint before training your Lora can really expand the range of options you can get from any Lora model. Simply train your Lora using the slice character sheet from the previous workflow and load it into this workflow once you're ready to get started.
Working with Lora's (Mascot Tool Pt.2) (3)
This workflow lets you load a Lora model that can be enhanced with whatever checkpoint you choose. In my examples, I used the Dynavision SDXL checkpoint as my Lora (of the bear) is in a toon style, which this checkpoint excels at. Changing the base checkpoint before training your Lora can really expand the range of options you can get from any Lora model. Simply train your Lora using the slice character sheet from the previous workflow and load it into this workflow once you're ready to get started.
Working with Lora's (Mascot Tool Pt.2) (4)
This workflow lets you load a Lora model that can be enhanced with whatever checkpoint you choose. In my examples, I used the Dynavision SDXL checkpoint as my Lora (of the bear) is in a toon style, which this checkpoint excels at. Changing the base checkpoint before training your Lora can really expand the range of options you can get from any Lora model. Simply train your Lora using the slice character sheet from the previous workflow and load it into this workflow once you're ready to get started.
Upscale Images by 4X
Upscale Images by 4X
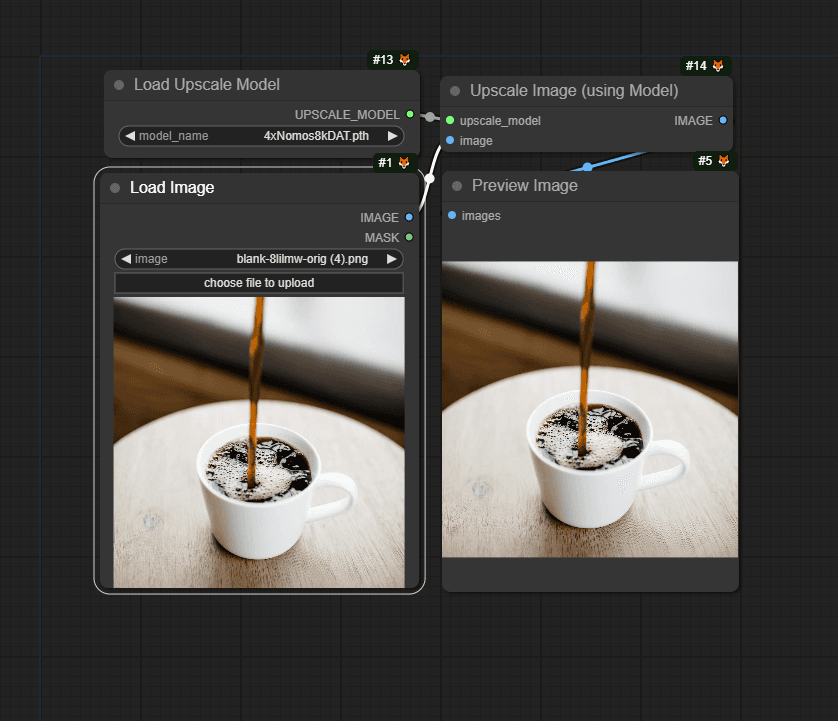
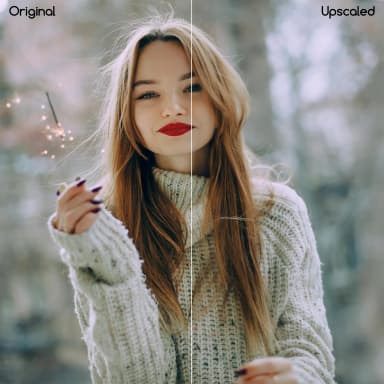
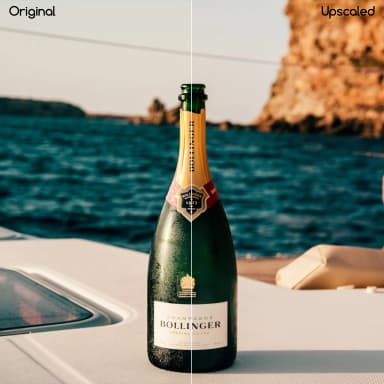
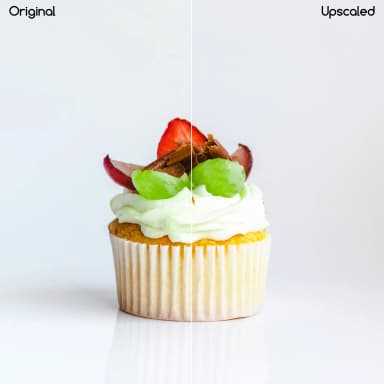
Easily upscale images by 4X with this workflow. Using the 4XNosmos8KDat upscaler model, you can get really professional results without the smoothing or artifacts that other upscale models can produce. Other upscale models can be used with this workflow (e.g., 4X_NMKD-Siax_200K, which is also good but can introduce some grain). Use the zoom feature in the examples to better see the upscaled results.
Easily upscale images by 4X with this workflow. Using the 4XNosmos8KDat upscaler model, you can get really professional results without the smoothing or artifacts that other upscale models can produce. Other upscale models can be used with this workflow (e.g., 4X_NMKD-Siax_200K, which is also good but can introduce some grain). Use the zoom feature in the examples to better see the upscaled results.
Upscale Images by 4X (1)
Easily upscale images by 4X with this workflow. Using the 4XNosmos8KDat upscaler model, you can get really professional results without the smoothing or artifacts that other upscale models can produce. Other upscale models can be used with this workflow (e.g., 4X_NMKD-Siax_200K, which is also good but can introduce some grain). Use the zoom feature in the examples to better see the upscaled results.
Upscale Images by 4X (2)
Easily upscale images by 4X with this workflow. Using the 4XNosmos8KDat upscaler model, you can get really professional results without the smoothing or artifacts that other upscale models can produce. Other upscale models can be used with this workflow (e.g., 4X_NMKD-Siax_200K, which is also good but can introduce some grain). Use the zoom feature in the examples to better see the upscaled results.
Upscale Images by 4X (3)
Easily upscale images by 4X with this workflow. Using the 4XNosmos8KDat upscaler model, you can get really professional results without the smoothing or artifacts that other upscale models can produce. Other upscale models can be used with this workflow (e.g., 4X_NMKD-Siax_200K, which is also good but can introduce some grain). Use the zoom feature in the examples to better see the upscaled results.

Upscale Images by 4X (4)
Easily upscale images by 4X with this workflow. Using the 4XNosmos8KDat upscaler model, you can get really professional results without the smoothing or artifacts that other upscale models can produce. Other upscale models can be used with this workflow (e.g., 4X_NMKD-Siax_200K, which is also good but can introduce some grain). Use the zoom feature in the examples to better see the upscaled results.
Basic Inpainting - Differential Diffusion
Basic Inpainting - Differential Diffusion
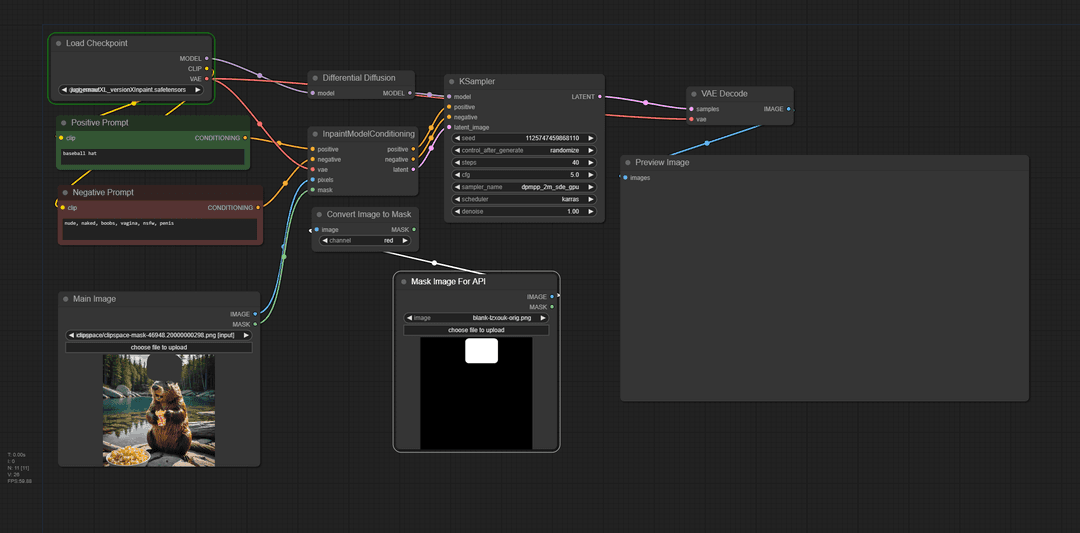
This is a simple inpainting workflow that utilizes differential diffusion to achieve consistent results and no seams. Although I'm using an inpainting SDXL checkpoint, without the simple differential diffusion node, the results would be suboptimal. There is an optional load image node for masks if you plan to use this via an API; however, with ComfyUI itself, you can just use the mask editor on the original load image node. This workflow should run on most consumer hardware, as it only uses one checkpoint.
This is a simple inpainting workflow that utilizes differential diffusion to achieve consistent results and no seams. Although I'm using an inpainting SDXL checkpoint, without the simple differential diffusion node, the results would be suboptimal. There is an optional load image node for masks if you plan to use this via an API; however, with ComfyUI itself, you can just use the mask editor on the original load image node. This workflow should run on most consumer hardware, as it only uses one checkpoint.
Basic Inpainting - Differential Diffusion (1)
This is a simple inpainting workflow that utilizes differential diffusion to achieve consistent results and no seams. Although I'm using an inpainting SDXL checkpoint, without the simple differential diffusion node, the results would be suboptimal. There is an optional load image node for masks if you plan to use this via an API; however, with ComfyUI itself, you can just use the mask editor on the original load image node. This workflow should run on most consumer hardware, as it only uses one checkpoint.
Basic Inpainting - Differential Diffusion (2)
This is a simple inpainting workflow that utilizes differential diffusion to achieve consistent results and no seams. Although I'm using an inpainting SDXL checkpoint, without the simple differential diffusion node, the results would be suboptimal. There is an optional load image node for masks if you plan to use this via an API; however, with ComfyUI itself, you can just use the mask editor on the original load image node. This workflow should run on most consumer hardware, as it only uses one checkpoint.
Basic Inpainting - Differential Diffusion (3)
This is a simple inpainting workflow that utilizes differential diffusion to achieve consistent results and no seams. Although I'm using an inpainting SDXL checkpoint, without the simple differential diffusion node, the results would be suboptimal. There is an optional load image node for masks if you plan to use this via an API; however, with ComfyUI itself, you can just use the mask editor on the original load image node. This workflow should run on most consumer hardware, as it only uses one checkpoint.
Basic Inpainting - Differential Diffusion (4)
This is a simple inpainting workflow that utilizes differential diffusion to achieve consistent results and no seams. Although I'm using an inpainting SDXL checkpoint, without the simple differential diffusion node, the results would be suboptimal. There is an optional load image node for masks if you plan to use this via an API; however, with ComfyUI itself, you can just use the mask editor on the original load image node. This workflow should run on most consumer hardware, as it only uses one checkpoint.
Remove Backgrounds with Segmentation and VitMatte
Remove Backgrounds with Segmentation and VitMatte
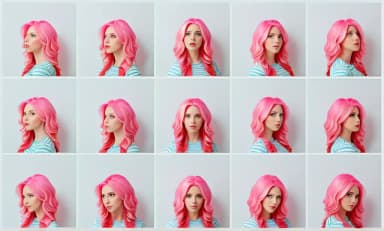
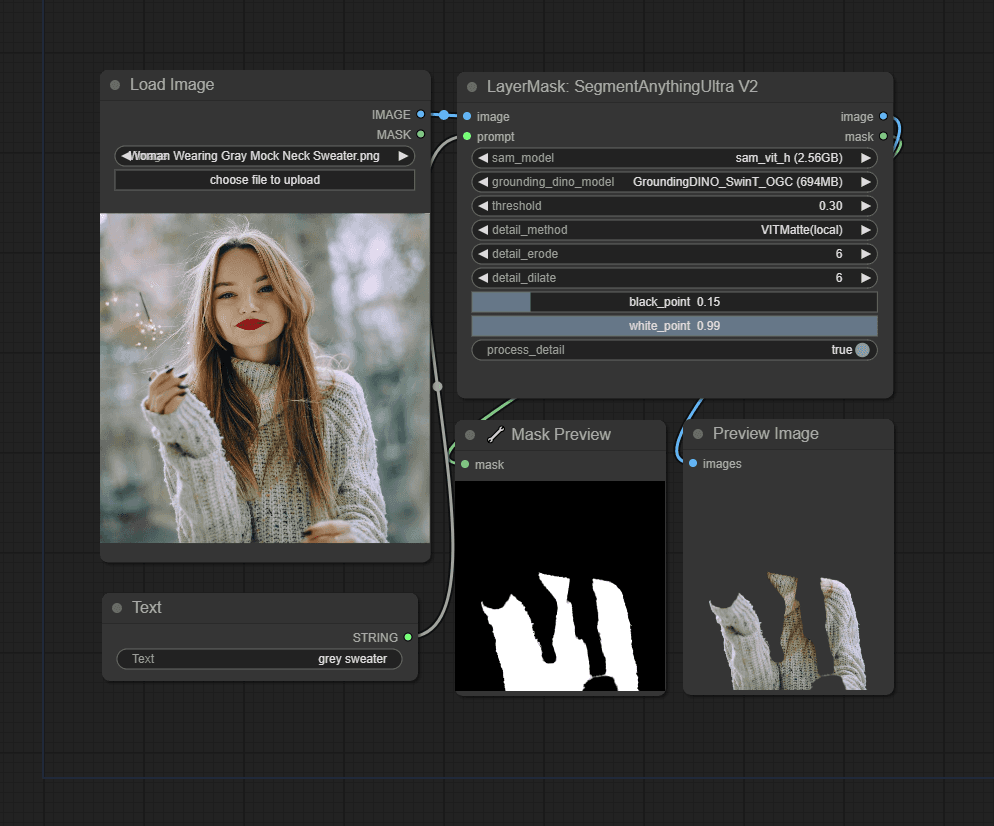
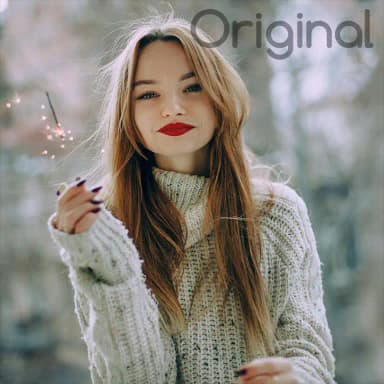
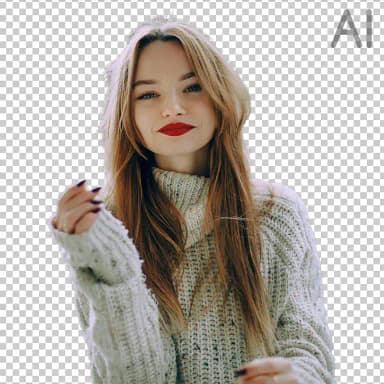
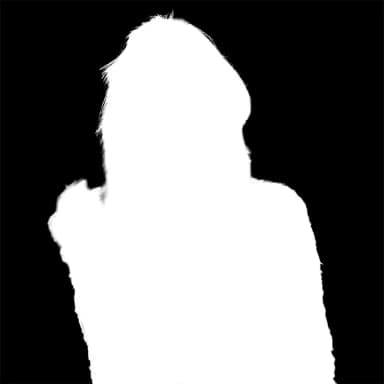
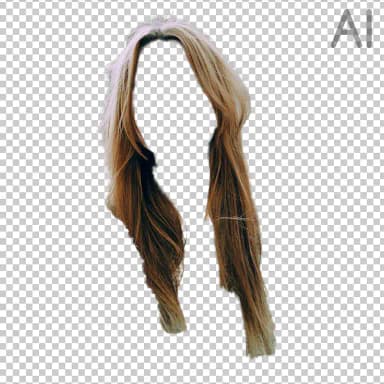
Remove the background from any image using this workflow. With segmentation, you can select which items to keep. In the examples below, you'll see where we selected the entire woman and also one where we selected her hair only. Using VitMatte, we can achieve a greater level of detail on the edges, retaining really fine details like hair. In the black and white mask example, you can see how the process has a very detailed edge.
Remove the background from any image using this workflow. With segmentation, you can select which items to keep. In the examples below, you'll see where we selected the entire woman and also one where we selected her hair only. Using VitMatte, we can achieve a greater level of detail on the edges, retaining really fine details like hair. In the black and white mask example, you can see how the process has a very detailed edge.
Remove Backgrounds with Segmentation and VitMatte (1)
Remove the background from any image using this workflow. With segmentation, you can select which items to keep. In the examples below, you'll see where we selected the entire woman and also one where we selected her hair only. Using VitMatte, we can achieve a greater level of detail on the edges, retaining really fine details like hair. In the black and white mask example, you can see how the process has a very detailed edge.
Remove Backgrounds with Segmentation and VitMatte (2)
Remove the background from any image using this workflow. With segmentation, you can select which items to keep. In the examples below, you'll see where we selected the entire woman and also one where we selected her hair only. Using VitMatte, we can achieve a greater level of detail on the edges, retaining really fine details like hair. In the black and white mask example, you can see how the process has a very detailed edge.
Remove Backgrounds with Segmentation and VitMatte (3)
Remove the background from any image using this workflow. With segmentation, you can select which items to keep. In the examples below, you'll see where we selected the entire woman and also one where we selected her hair only. Using VitMatte, we can achieve a greater level of detail on the edges, retaining really fine details like hair. In the black and white mask example, you can see how the process has a very detailed edge.
Remove Backgrounds with Segmentation and VitMatte (4)
Remove the background from any image using this workflow. With segmentation, you can select which items to keep. In the examples below, you'll see where we selected the entire woman and also one where we selected her hair only. Using VitMatte, we can achieve a greater level of detail on the edges, retaining really fine details like hair. In the black and white mask example, you can see how the process has a very detailed edge.
Small Object Removal using Big Lama
Small Object Removal using Big Lama
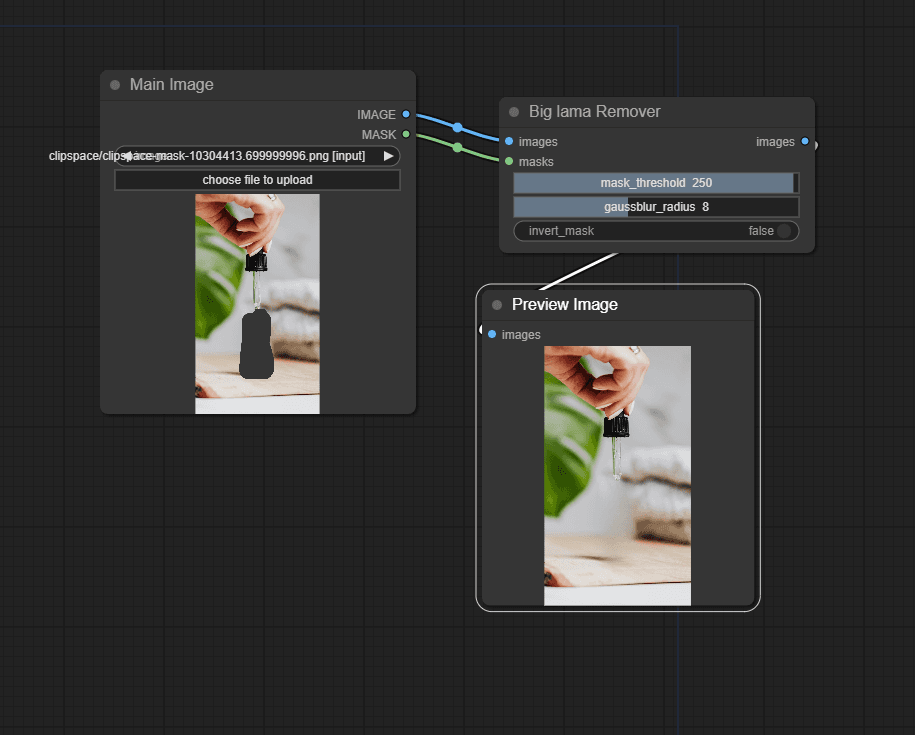
This workflow allows you to easily remove unwanted objects from a scene. Using the Big Lama nodes, you can quickly and easily remove small objects and details from a scene. This is a very lightweight workflow, using no Stable Diffusion checkpoints and only the Lama model. You can see from the final thumbnail that the tool fails if the object being removed is too large.
This workflow allows you to easily remove unwanted objects from a scene. Using the Big Lama nodes, you can quickly and easily remove small objects and details from a scene. This is a very lightweight workflow, using no Stable Diffusion checkpoints and only the Lama model. You can see from the final thumbnail that the tool fails if the object being removed is too large.
Small Object Removal using Big Lama (1)
This workflow allows you to easily remove unwanted objects from a scene. Using the Big Lama nodes, you can quickly and easily remove small objects and details from a scene. This is a very lightweight workflow, using no Stable Diffusion checkpoints and only the Lama model. You can see from the final thumbnail that the tool fails if the object being removed is too large.

Small Object Removal using Big Lama (2)
This workflow allows you to easily remove unwanted objects from a scene. Using the Big Lama nodes, you can quickly and easily remove small objects and details from a scene. This is a very lightweight workflow, using no Stable Diffusion checkpoints and only the Lama model. You can see from the final thumbnail that the tool fails if the object being removed is too large.
Small Object Removal using Big Lama (3)
This workflow allows you to easily remove unwanted objects from a scene. Using the Big Lama nodes, you can quickly and easily remove small objects and details from a scene. This is a very lightweight workflow, using no Stable Diffusion checkpoints and only the Lama model. You can see from the final thumbnail that the tool fails if the object being removed is too large.
Small Object Removal using Big Lama (4)
This workflow allows you to easily remove unwanted objects from a scene. Using the Big Lama nodes, you can quickly and easily remove small objects and details from a scene. This is a very lightweight workflow, using no Stable Diffusion checkpoints and only the Lama model. You can see from the final thumbnail that the tool fails if the object being removed is too large.
Object Removal using MAT
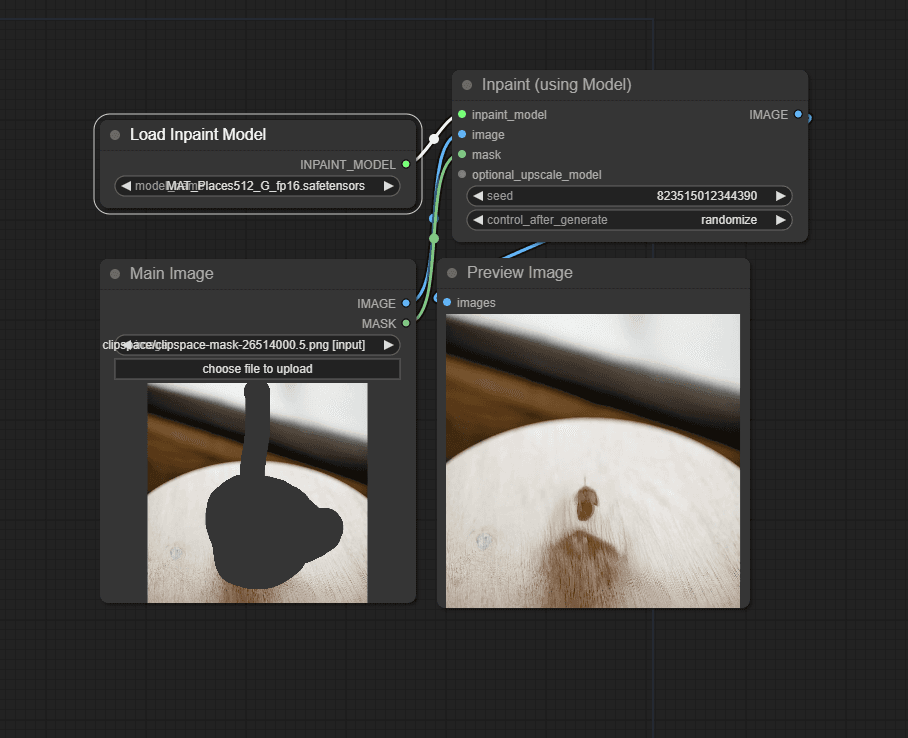
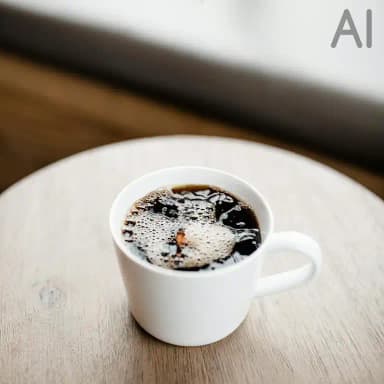
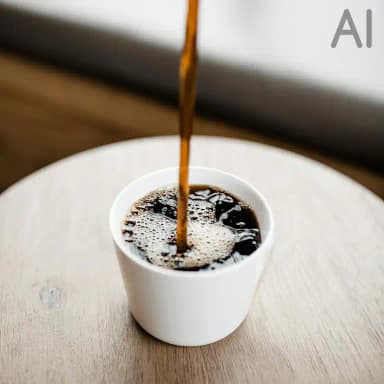
Object Removal using MAT
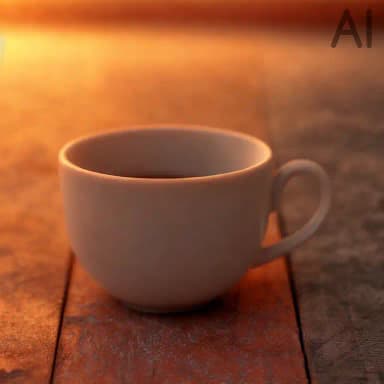
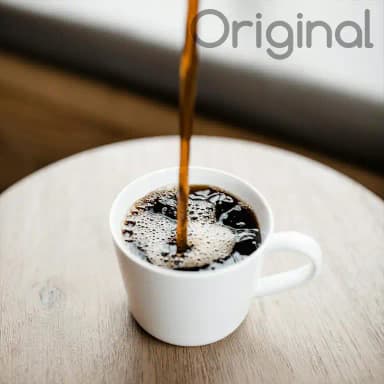
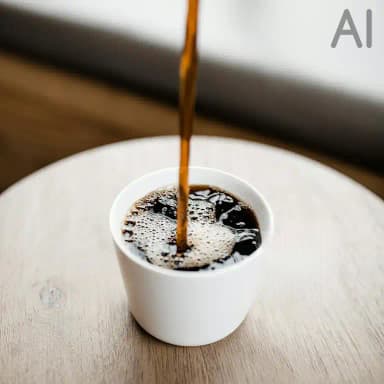
Similar to the previous model, but using the MAT inpainting model. This can provide cleaner results, especially with larger objects. However, it can hallucinate and create unwanted artifacts, especially if your mask is too small in relation to the object (you need a good border around the object). As you can see from the examples with Lama (above) and MAT, you can get cleaner results, and the large object removal in the last example looks really good, as if no cup had ever been on the table.
Similar to the previous model, but using the MAT inpainting model. This can provide cleaner results, especially with larger objects. However, it can hallucinate and create unwanted artifacts, especially if your mask is too small in relation to the object (you need a good border around the object). As you can see from the examples with Lama (above) and MAT, you can get cleaner results, and the large object removal in the last example looks really good, as if no cup had ever been on the table.

Object Removal using MAT (1)
Similar to the previous model, but using the MAT inpainting model. This can provide cleaner results, especially with larger objects. However, it can hallucinate and create unwanted artifacts, especially if your mask is too small in relation to the object (you need a good border around the object). As you can see from the examples with Lama (above) and MAT, you can get cleaner results, and the large object removal in the last example looks really good, as if no cup had ever been on the table.
Object Removal using MAT (2)
Similar to the previous model, but using the MAT inpainting model. This can provide cleaner results, especially with larger objects. However, it can hallucinate and create unwanted artifacts, especially if your mask is too small in relation to the object (you need a good border around the object). As you can see from the examples with Lama (above) and MAT, you can get cleaner results, and the large object removal in the last example looks really good, as if no cup had ever been on the table.
Object Removal using MAT (3)
Similar to the previous model, but using the MAT inpainting model. This can provide cleaner results, especially with larger objects. However, it can hallucinate and create unwanted artifacts, especially if your mask is too small in relation to the object (you need a good border around the object). As you can see from the examples with Lama (above) and MAT, you can get cleaner results, and the large object removal in the last example looks really good, as if no cup had ever been on the table.
Object Removal using MAT (4)
Similar to the previous model, but using the MAT inpainting model. This can provide cleaner results, especially with larger objects. However, it can hallucinate and create unwanted artifacts, especially if your mask is too small in relation to the object (you need a good border around the object). As you can see from the examples with Lama (above) and MAT, you can get cleaner results, and the large object removal in the last example looks really good, as if no cup had ever been on the table.